Apache ANT Tutorial: What is Apache Ant Build Tool?
Details
What is a Build Tool?
A build tool is a programming tool which is used to build a new version of a program. It automates the creation of an executable application from any source code.
What is Apache Ant?
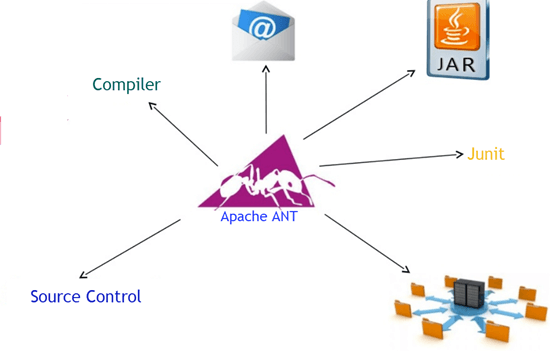
Apache Ant is a Java-based command-line tool for building Java applications with the full portability of pure Java code. It allows developers to adopt agile principles and test-driven development to automate the repetitive development tasks like generating documentation, etc. Ant is an acronym for Another Neat Tool.
In this Apache ANT tutorial for beginners, you will learn:
Here, are important pros/benefits of using the Build tool:
Build tool allows you to automate specific repetitive tasks for like compiling the source code, running software tests, and creating files for the software deployment.
Build tools mostly run without a graphical user interface.
Helps you to convert source code into executable code
Offers an option to recompile a file only if necessary
Allows you to compile numbers of files in a relatively short time
Two widely popular build tools used by Java developers are Apache Maven and Ant.
Apache Ant
History of Apache Ant
Now in this Apache ANT tutorial, we will learn about the history of Apache Ant Build Tool.
Here, are important historical landmarks from the Apache Ant tool:
James Duncan Davidson created an Ant on July 2000.
It was initially used to build Tomcat and was comes as an in-built product of Tomcat distribution kit.
In May 2014, Apache Ant version 1.9.4 released with many advanced features.
It's the latest version is 1.10.3 which was released on March 2018.
Features of Apache Ant
Here, are essential features of Apache Ant:
It's an open-source project.
Allow you to run builds on both Windows and UNIX/Linux systems.
You only require JVM as It runs anywhere when JVM is available.
Offers an extensive range of predefined tasks
Helps you to copy from one location to another.
Offers interface to develop custom tasks.
Allows you to invoke from the command line which can easily integrate with free and commercial IDEs.
Allows you to deploy the binaries to the test server
Offers Extensible Architecture
Offers Backward Compatibility
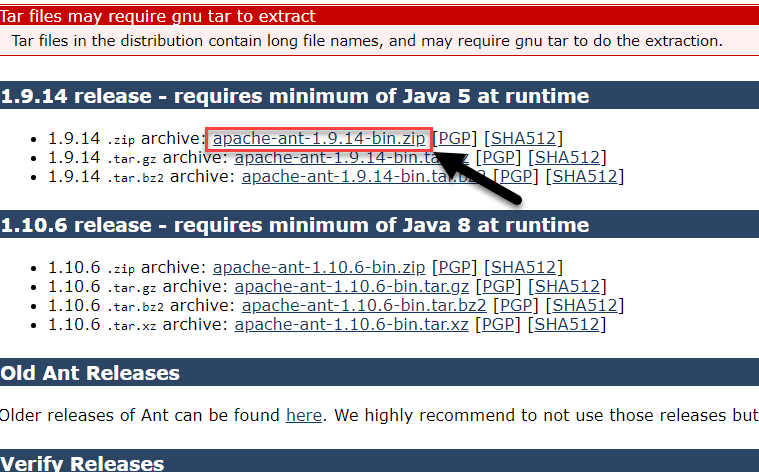
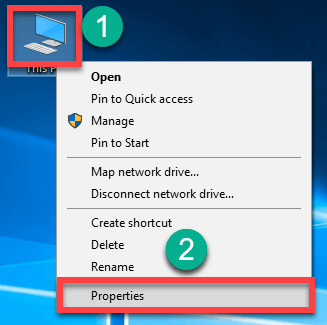
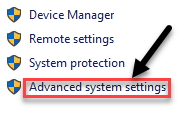
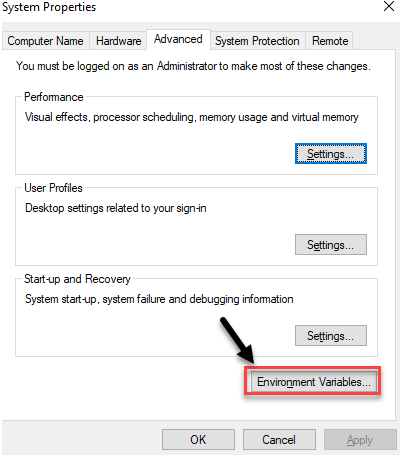
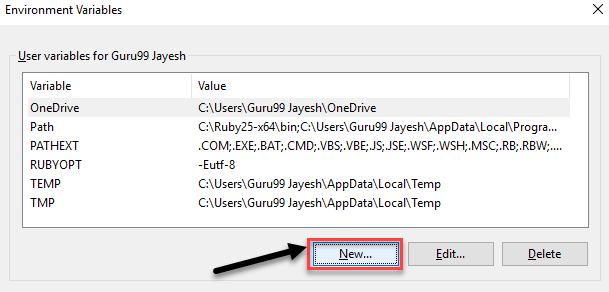
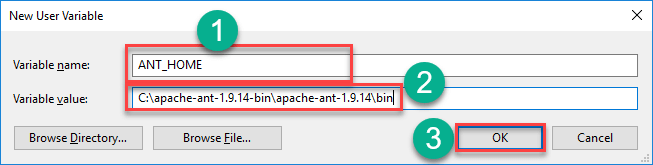
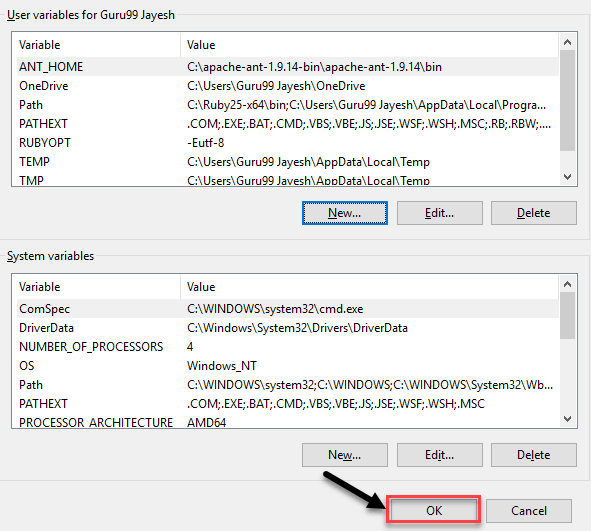
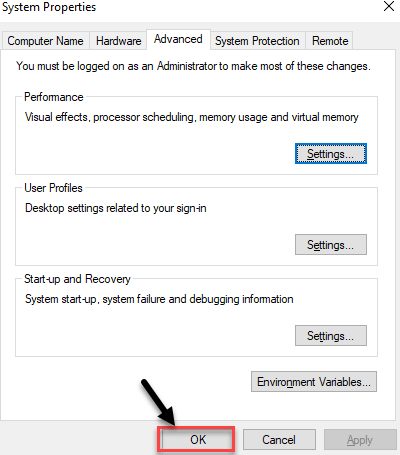
How to Install and Configure Apache Ant on Windows
Now in this Apache ANT tutorial, we will learn the process of installing Apache Ant on Windows.
We are assuming that you have already downloaded and installed the Java Development Kit (JDK) into your computer. Make sure that the JAVA_HOME environment variable is set to the folder where your JDK is installed. Follow the below steps for installing Ant:
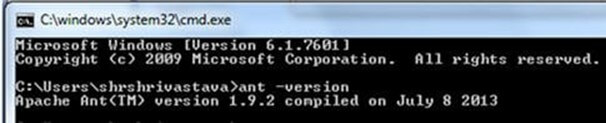
Goto CMD and move to the dir where you have put the simplebuild.xml
Now write, ant-file buildl.xml Hello_World_Target. This should show us Hello World.
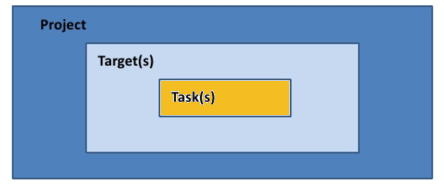
ANT Project Structure
Every build will contain three nodes:
Project
Target
Task
Project:
Everything inside the build file in Apache ANT is under a project.
Attributes:
Name The name of a project.
Basedir: This the directory from where all the paths will be calculated. This can be overridden by using "basedir" property.
Default: Helps you to define the default target for this project. If no target is given, then it will execute the "default."
Target:
Target is a set of tasks, which is defined to get a specific state for the build process.
Attributes:
Name: Nate of the target (required)
Description: Description of the target
Depends: Which target this current target depend upon.
If: Executes the target only if a value is set for a target property
Unless: Executes the target if the property value is not set
Tasks:
It's a piece of code which can be executed. Task have multiple argument or attributes.
The general method pattern to write task is:
<name attribute1="value" attribute2="value2"…/>
You can either use the build in a task, or you can build your own task.
Best practices of Using Apache Ant
Here, are some best practices to use Apache Ant.
You should automate build numbering using property files.
Implementing a configurable build with the help of default and build property files. These files allow you to store properties that define the data for your build process, like compiler version and optimization settings, etc.
You can reuse prebuilt libraries using library property files.
Advantages of Using Apache Ant
Here, are pros/ benefits of using Apache Ant:
It is Ant. It is platform-neutral, so it helps you to manage platform-centric properties such as file separators.
Ant allows you to perform platform-specific tasks like modifying the modified time of a file using 'touch' command.
Ant scripts are written using plain XML so If you are already familiar with XML, you will able to learn Ant quickly.
Ant offers a big list of predefined tasks.
It offers an interface to developing customize tasks.
You can easily invoke ant from the command line. It allows you to integrate with free and commercial IDEs.
You need JVM: It runs anywhere JVM is available.
Apache Ant is an open-source library which allows users to access the source code and reproduce it.
Apache Ant is a cross-platform tool which allows you to handle Java classpath and file directory structure in an affordable manner.
Apache Ant is easily extensible using Java and other programming languages.
Apache Ant offers built-in support for J2EE development like EJB compilation and packaging.
You can use it for the small personal project which can also be used in a large software project or on their website.
Summary
A build tool is a programming tool which is used to build a new version of a program.
Ant (an acronym for Another Neat Tool) is an XML based build tool. It is a widely used Java-based build tool with the full portability of the pure Java code.
Apache ANT helps you to convert source code into executable code.
James Duncan Davidson created ant in July 2000.
Apache Ant offers an extensive range of predefined tasks.
Every build will contain three nodes: 1) Project 2) Target 3) Task.
Everything inside the build file in Apache ANT is under a project.
Target is a set of tasks, which is defined to get a specific state for the build process.
A task is a piece of code which can be executed. Task have multiple argument or attributes.
It is the best practice to automate build numbering using property files in Apache ANT.
The biggest advantage of Apache ANT is that it is platform-neutral, so it helps you to manage platform-centric properties such as file separators.