PHP
How to Send Email using PHP mail() Function
What is PHP mail? PHP mail is the built in PHP function that is used to send emails from PHP...
Forms provide a way for users to interact with the application and submit data. It can be used for a contact us form that a visitor to the website can fill in and send the information to us. The information received is usually stored in the database or send via email.
In this tutorial, you will learn:
The following code shows the structure of a typical HTML form.
<form id="frmUsers" name="frmUsers" method="POST" action="create_user.php">
	<input type="text" id="user_id" name="user_id">
	<input type="password" id="password" name="password">

	<input type="submit" value="Submit">
</form>
HERE,
HTML is great is easy to understand and write, but CodeIgniter makes things even simpler. CodeIgniter has built-in functions to create HTML forms.
Let's consider the following CodeIgniter specific code that uses the form helper to create a form
 <?php
        echo form_open('create_user.php', ['id' => 'frmUsers']);

        echo form_label('User Id', 'user_id');
        echo form_input(['name' => 'user_id']);

        echo form_label('Password', 'password');
        echo form_input(['type' => 'password', 'name' => 'password']);

        echo form_submit('btnSubmit', 'Create User');

        echo form_close();
        ?>
HERE,
As you can see from the above CodeIgniter code, form helpers make it easy for us to create forms using pure PHP. By passing attributes to the form helper methods, we can customize the HTML that is generated for the form.
The above code generates the following HTML form code
        <form action="http://localhost:3000/index.php/create_user.php" id="frmUsers" method="post" accept-charset="utf-8">
            <label for="user_id">User Id</label>
            <input type="text" name="user_id" value=""/>

            <label for="password">Password</label>
            <input type="password" name="password" value=""/>

            <input type="submit" name="btnSubmit" value="Create User"/>
        </form>
The biggest advantages of using the form helper is that it generates semantically correct code that adheres to the set HTML standards.
You can refer to the official CodeIgniter documentation for more details
https://codeigniter.com/user_guide/helpers/form_helper.html
After covering the basics of CodeIgniter let's get back to our tutorial project which we have been working on throughout the tutorial series. In summary, the tutorial project builds a contacts management app that will store the details in the database.
in the previous tutorial, we created routes for our applications and simple views. Open application/views/contacts/create.php
Modify the code for create.php as follows
<div class="column">
    <h2 class="title">Create Contact</h2>
    <form action="<?= base_url('contacts/store') ?>" method="POST">
        <div class="field">
            <label class="label">Contact Name</label>
            <div class="control">
                <input id="name" name="name" class="input" type="text" placeholder="Type the contact name">
            </div>
        </div>
        <div class="field">
            <label class="label">Contact Number</label>
            <div class="control">
                <input id="name" name="name" class="input" type="text" placeholder="Type the contact number">
            </div>
        </div>
        <div class="field">
            <label class="label">Email Address</label>
            <div class="control">
                <input id="email" name="email" class="input" type="email" placeholder="Type the email address">
            </div>
        </div>
        <div class="field is-grouped">
            <div class="control">
                <button class="button is-link">Save Contact</button>
            </div>
        </div>
    </form>
</div>
Note: the above code uses plain HTML to create forms.
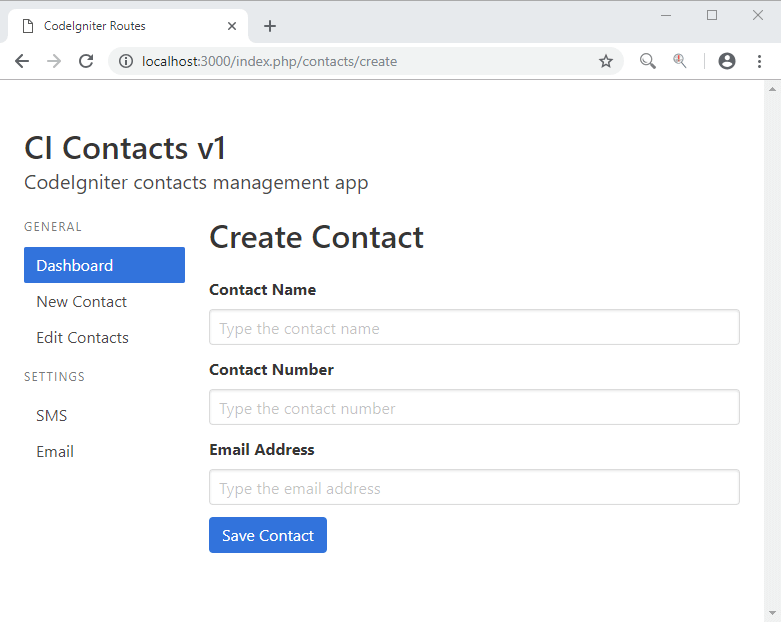
Let's now see how our forms look like in the web browser
Load the following URL into our web browser.
http://localhost:3000/contacts/create
If you have been creating the tutorial project, then you should be able to see the following
Validation plays a very critical role when processing data from forms. Let's say a user is signing up on a website; we want to make sure that they fill in their required details and email address. We need to make sure that the email address that has been entered is valid. If we are working with date values, then we want to make sure the date ranges are valid. We wouldn't have to accept a date that has 32 days in a month etc.
Validation solves the above problems. Validation is done on two (2) fronts when working with web applications.
Client-side validation is done on the part of the web browser. This usually involves the use of HTML and JavaScript. Client-side validation improves performance as everything is done at the client-side. So, there is no need to submit the data to the server. The disadvantage of client-side validation is the user has control over it. If you rely on JavaScript to validate and the user disables JavaScript in the browser, then your validation will fail.
Server-side validation is done on the server-side. The downside of this validation is the user has to submit the data to the server for processing and wait for the response. This uses up network resources and may degrade the performance. The major advantage of server-side validation is you have greater control and you are assured of your validation rules working even if the user disables JavaScript in the browser.
A better strategy is to use client-side as the primary validation strategy and server-side as a fallback mechanism.
CodeIgniter has a built-in validation library. The library is loaded using the following line
$this->load->library('form_validation'); The validation library can be used to perform some of the following actions
Validation rules are set using the following format
$this->form_validation->set_rules('field','human readable field','rule',['custom message']); HERE,
The following is an example for validating the contact name
$this->form_validation->set_rules('contact_number', 'Contact Number', 'required'); HERE,
To run the validation against the set rules, we use the following function of the validation library
$this->form_validation->run()
If the above code returns false, then one or more set rules have failed. If it returns true, then the validation rules have all passed, and you may proceed with further action.
Let's look at more examples of validation rules. Suppose you want to validation some fields say the contact name, number and email address, you can use the following code to accomplish that.
$rules = array(
        array(
                'field' => 'contact_name',
                'label' => 'Contact Name',
                'rules' => 'required'
        ),
        array(
                'field' => 'contact_number',
                'label' => 'Contact Number',
                'rules' => 'required',
                'errors' => array(
                        'required' => 'You must provide a %s.',
                ),
        ),
        array(
                'field' => 'email_address',
                'label' => 'Email Address',
                'rules' => 'required'
        )
);

$this->form_validation->set_rules($rules);
HERE,
If we want to validate the contact number to ensure that we do not save the same number twice, we can use the following rule to do that.
$this->form_validation->set_rules('contact_number', 'Contact Number','required|is_unique[contacts.contact_number]');
HERE,
If an error occurs during the processing of the form, you can use the following code to display the validation errors that occurred
<?php echo validation_errors(); ?>
HERE,
Some forms have many fields, and if an error has occurred, then you want to make sure that the data that was added correctly is preserved. The validation library has mechanisms for accomplishing that. We do that by using the following code.
<?php echo set_value('field_name'); ?> HERE,
For a complete reference guide on the methods that are available under the validation library, you can refer to the API documentation from the official user guide for CodeIgniter
https://codeigniter.com/userguide3/libraries/form_validation.html
Throughout these tutorial series, we have been adding more code to our tutorial project which is a contacts management application. In this section, we will load the validation library and see how we can put it to practical use using a real-world example application.
Modify the routes code as follows to include the store method
$route['default_controller'] = 'welcome';
$route['contacts'] = 'contacts';
$route['create'] = 'contacts/create';
$route['store'] = 'contacts/store';
$route['edit/:id'] = 'contacts/edit';
$route['update/:id'] = 'contacts/update';
$route['delete/:id'] = 'contacts/delete';
$routes['users'] = 'welcome/users';
Let's now load the form validation library in the Contacts controller and set some validation rules.
Modify the code as follows
<?php

defined('BASEPATH') OR exit('No direct script access allowed');

class Contacts extends CI_Controller {

    public function __construct() {
        parent::__construct();
        $this->load->helper('url', 'form');
        $this->load->library('form_validation');
    }

    public function index() {
        $this->load->view('header');
        $this->load->view('contacts/index');
        $this->load->view('footer');
    }

    public function create() {
        $this->load->view('header');
        $this->load->view('contacts/create');
        $this->load->view('footer');
    }

    public function store() {
        $rules = array(
            array(
                'field' => 'contact_name',
                'label' => 'Contact Name',
                'rules' => 'required'
            ),
            array(
                'field' => 'contact_number',
                'label' => 'Contact Number',
                'rules' => 'required',
                'errors' => array(
                    'required' => 'You must provide a %s.',
                ),
            ),
            array(
                'field' => 'email_address',
                'label' => 'Email Address',
                'rules' => 'required'
            )
        );

        $this->form_validation->set_rules($rules);

        if ($this->form_validation->run() == FALSE) {
            $this->load->view('header');
            $this->load->view('contacts/create');
            $this->load->view('footer');
        } else {
            redirect(base_url('contacts'));
        }
    }

    public function edit($id) {
        $this->load->view('header');
        $this->load->view('contacts/edit');
        $this->load->view('footer');
    }

    public function update($id) {
        $this->load->view('header');
        $this->load->view('contacts/update');
        $this->load->view('footer');
    }

    public function delete($id) {
        $this->load->view('header');
        $this->load->view('contacts/delete');
        $this->load->view('footer');
    }
}
HERE,
Modify the create view in application/contacts/create.php code
<div class="column">
    <h2 class="title">Create Contact</h2>
    <div class="notification is-danger">
    <?php echo validation_errors(); ?>
    </div>
    <form action="<?= base_url('contacts/store') ?>" method="POST">
        <div class="field">
            <label class="label">Contact Name</label>
            <div class="control">
                <input id="contact_name" name="contact_name" class="input" type="text" value="<?php echo set_value('contact_name'); ?>" placeholder="Type the contact name">
            </div>
        </div>
        <div class="field">
            <label class="label">Contact Number</label>
            <div class="control">
                <input id="contact_number" name="contact_number" class="input" type="text" value="<?php echo set_value('contact_number'); ?>" placeholder="Type the contact number">
            </div>
        </div>
        <div class="field">
            <label class="label">Email Address</label>
            <div class="control">
                <input id="email_address" name="email_address" class="input" type="email" value="<?php echo set_value('email_address'); ?>" placeholder="Type the email address">
            </div>
        </div>
        <div class="field is-grouped">
            <div class="control">
                <button class="button is-link">Save Contact</button>
            </div>
        </div>
    </form>
</div>
HERE,
You need to load the following URL into your web browser. Then click on Create Contact without entering any values
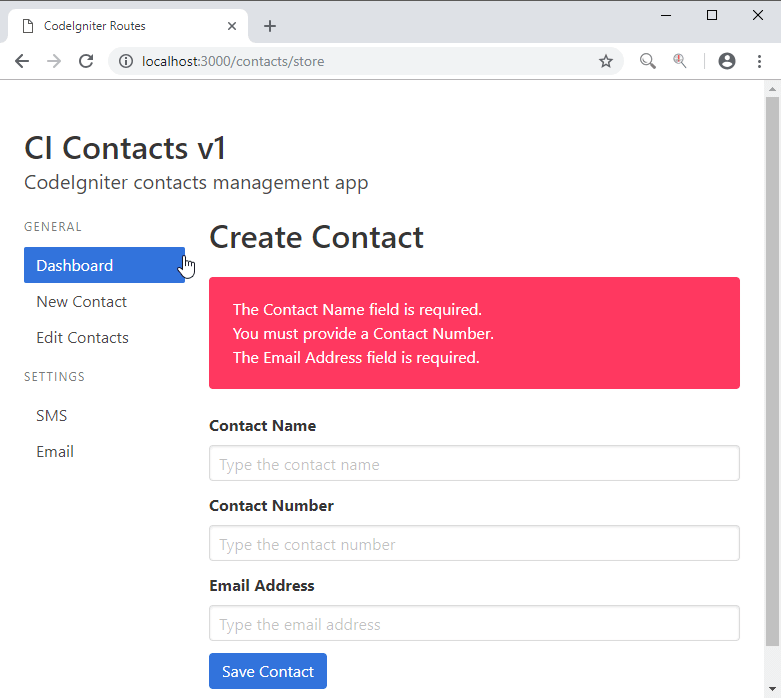
In this tutorial, we have seen major validation strategies and their pros and cons. We also learned how- to set validation rules and out error messages using CodeIgniter's built-in validation library. We have ended the lesson by implementing the knowledge gained in a practical application.
What is PHP mail? PHP mail is the built in PHP function that is used to send emails from PHP...
What is a control structure? Code execution can be grouped into categories as shown below...
What is XAMPP? XAMPP is an open source cross platform web server, MySQL database engine, and PHP...
In this PHP project , we are going to create an opinion poll application. The opinion poll will...
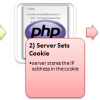
What is Cookie? A cookie is a small file with the maximum size of 4KB that the web server stores...
What is Form? When you login into a website or into your mail box, you are interacting with a...