Asp.Net

ASP.NET Tutorial PDF for Beginners (FREE Download)
$20.20 $9.99 for today 4.6 (118 ratings) Key Highlights of ASP.NET Tutorial PDF 157+ pages eBook...
Accessing Data from a database is an important aspect of any programming language. It is necessary for any programming language to have the ability to work with databases.
ASP.Net has the ability to work with different types of databases. It can work with the most common databases such as Oracle and Microsoft SQL Server.
It also has the ability to work with new forms of databases such as MongoDB and MySQL.
In this tutorial, you will learn-
ASP.Net has the ability to work with a majority of databases. The most common being Oracle and Microsoft SQL Server. But with every database, the logic behind working with all of them is mostly the same.
In our examples, we will look at working with the Microsoft SQL Server as our database. For learning purposes, one can download and use the Microsoft SQL Server Express Edition. This is a free database software provided by Microsoft.
While working with databases, the following concepts which are common across all databases.
Ok, now that we have seen the theory part of each operation. Now, let's see how to perform database operations in ASP.Net.
Let's now look at the code, which needs to be kept in place to create a connection to a database. In our example, we will connect to a database which has the name of Demodb. The credentials used to connect to the database are given below
Let's work with our current web application created in the earlier sections.
Let's follow the below-mentioned steps to achieve this.
Step 1) Let's first ensure that you have your web application (DemoApplication) opened in Visual Studio. Double click the 'demo.aspx.cs' file to enter the code for the database connection.

Step 2) Add the below code which will be used to establish a connection to the database.

namespace DemoApplication
{
public partial class Demo System.Web.UI.Page
{
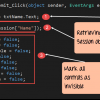
protected void Page_Load(object sender, EventArgs e)
{
string connetionString;
SqlConnection cnn;
connetionString = @"Data Source=WIN-50GP30FGO75;Initial Catalog=Demodb ;User ID=sa;Password=demol23";
cnn = new SqlConnection(connetionString);
cnn.Open();
Response.Write("Connection MAde");
conn.Close();
}
}
}Code Explanation:-
When the above code is set, and the project is executed using Visual Studio. You will get the below output. Once the form is displayed, click the Connect button.
Output:-

The output message displayed in the browser will show that the connection to the database is made.
To show data accessed using Asp.Net, let us assume the following artifacts in our database.
TutorialID | TutorialName |
1 | C# |
2 | ASP.Net |
Let's change the code so that we can query for this data and display the information on the web page itself. Note that the code entered is in continuation to that written for the data connection module.
Step 1) Let's split the code into two parts,

Code Explanation:-
Step 2) In the final step, we will just display the output to the user. Then we will close all the objects related to the database operation.

namespace DemoApplication
{
	public partial class Demo System.Web.UI.Page
    {
	  protected void Page_Load(object sender, EventArgs e)
	  {
		SqlCommand command;
		SqlDataReader dataReader;
		String sql, Output =" ";
		sql = "Select TutorialID,TutorialName from demotb";

		command = new SqlCommand(sql, cnn);

		dataReader = sqlquery.ExecuteReader();
		while (dataReader.Read())
		{
		  Output = Output + dataReader.GetValue(0) + "-" + dataReader.GetValue(1) + "</br>";
		}

		Response.Write(Output);
		dataReader.Close();
		command.dispose();
		conn.Close();

	  }
	}
}
Code Explanation:-
When the above code is set, and the project is run using Visual Studio, you will get the below output.
Output:-

From the output, you can clearly see that the program was able to get the values from the database. The data is then displayed in the browser to the user.
Just like Accessing data, ASP.Net has the ability to insert records into the database as well. Let's take the same table structure used for inserting records.
| TutorialID | TutorialName |
| 1 | C# |
| 2 | ASP.Net |
Let's change the code in our form, so that we can insert the following row into the table
| TutorialID | TutorialName |
| 3 | VB.Net |
Step 1) As the first step let's add the following code to our program. The below code snippet will be used to insert an existing record in our database.

namespace DemoApplication
{
	public partial class Demo System.Web.UI.Page
    {
	  protected void Page_Load(object sender, EventArgs e)
	  {
		SqlCommand command;
		SqlDataAdapter adapter = new SqlDataAdapter();
		String sql="";

		sql = "Insert into demotb(TutorialID,TutorialName) value(3, '" + "VB.Net +"')";

		command = new SqlCommand(sql,cnn);
		adapter.InsertCommand = new SqlCommand(sql,cnn);
		adapter.InsertCommand.ExecuteNonQuery();

		command.Dispose():
		cnn.Close();

	  }
	}
}
Code Explanation:-
Step 2) As a second step, let's add the same code as in the Accessing data section. This is to display the recent table data in the browser. For that, we will add the below code to the demo.aspx.cs file.

namespace DemoApplication
{
	public partial class Demo System.Web.UI.Page
    {
	  protected void Page_Load(object sender, EventArgs e)
	  {
		SqlCommand sqlquery;
		SqlDataReader dataReader;
		String Output =" ";
		sql = "Select TutorialID,TutorialName from demotb";

		sqlquery = new SqlCommand(sql, cnn);

		dataReader = command.ExecuteReader();
		while (dataReader.Read())
		{
		  Output = Output + dataReader.GetValue(0) + "-" + dataReader.GetValue(1) + "</br>";
		}

		Response.Write(Output);
		dataReader.Close();
		command.dispose();
		conn.Close();
	  }
	}
}
When the above code is set, and the project is executed in Visual Studio, you will get the below output.
Output:-

In the browser window, you will see that the rows was successfully inserted in the database.
ASP.Net has the ability to update existing records from a database. Let's take the same table structure which was used above for the example to insert records.
| TutorialID | TutorialName |
| 1 | C# |
| 2 | ASP.Net |
| 3 | VB.Net |
Let's change the code in our form, so that we can update the following row. The old row value is TutorialID as "3" and Tutorial Name as "VB.Net". Which we will update it to "VB.Net complete" while the row value for Tutorial ID will remain same.
Old row
| TutorialID | TutorialName |
| 3 | VB.Net |
New row
| TutorialID | TutorialName |
| 3 | VB.Net complete |
Step 1) As the first step let's add the following code to our program. The below code snippet will be used to update an existing record in our database.

namespace DemoApplication
{
	public partial class Demo System.Web.UI.Page
    {
	  protected void Page_Load(object sender, EventArgs e)
	  {
		SqlCommand command;
		SqlDataAdapter adapter = new SqlDataAdapter();
		String sql="";

		sql = "Update demotb set TutorialName='"VB.Net Complete"+"' where TutorialID=3";

		command = new SqlCommand(sql,cnn);

		adapter.InsertCommand = new SqlCommand(sql,cnn);
		adapter.InsertCommand.ExecuteNonQuery;

		command.Dispose():
		cnn.Close();

	  }
	}
}
Code Explanation:-
Step 2) As a second step, let's add the same code as in the Accessing data section. This is to display the recent table data in the browser. For that, we will add the below code

namespace DemoApplication
{
	public partial class Demo System.Web.UI.Page
    {
	  protected void Page_Load(object sender, EventArgs e)
	  {
		SqlCommand sqlquery;
		SqlDataReader dataReader;
		String Output =" ";
		sql = "Select TutorialID,TutorialName from demotb";

		sqlquery = new SqlCommand(sql, cnn);

		dataReader = command.ExecuteReader();

		while (dataReader.Read())
		{
		  Output = Output + dataReader.GetValue(0) + "-" + dataReader.GetValue(1) + "</br>";
		}

		Response.Write(Output);
		dataReader.Close();
		command.dispose();
		conn.Close();
	  }
	}
}
When the above code is set, and the project is executed using Visual Studio, you will get the below output.
Output:-

In the browser window, you will see that the rows were successfully updated in the database.
ASP.Net can delete existing records from a database. Let's take the same table structure which was used above for the example to delete records.
TutorialID | TutorialName |
1 | C# |
2 | ASP.Net |
3 | VB.Net complete |
Let's change the code in our form so that we can delete the following row
TutorialID | TutorialName |
3 | VB.Net complete |
So let's add the following code to our program. The below code snippet will be used to delete an existing record in our database.
Step 1) As the first step let's add the following code to our program. The below code snippet will be used to delete an existing record in our database.

namespace DemoApplication
{
	public partial class Demo System.Web.UI.Page
    {
	  protected void Page_Load(object sender, EventArgs e)
	  {
		SqlCommand command;
		SqlDataAdapter adapter = new SqlDataAdapter();
		String sql="";

		sql = "Delete demotb where TutorialID=3";

		command = new SqlCommand(sql,cnn);

		adapter.DeleteCommand = new SqlCommand(sql,cnn);
		adapter.DeleteCommand.ExecuteNonQuery;

		command.Dispose():
		cnn.Close();

	  }
	}
}
Code Explanation:-
Step 2) As a second step, let's add the same code as in the Accessing data section. This is to display the recent table data in the browser. For that, we will add the below code.

namespace DemoApplication
{
	public partial class Demo System.Web.UI.Page
    {
	  protected void Page_Load(object sender, EventArgs e)
	  {
		SqlCommand sqlquery;
		SqlDataReader dataReader;
		String Output ="";
		sql = "Select TutorialID,TutorialName from demotb";

		sqlquery = new SqlCommand(sql, cnn);

		dataReader = command.ExecuteReader();

		while(dataReader.Read())
		{
		  Output = Output + dataReader.GetValue(0) + "-" + dataReader.GetValue(1) + "</br>";
		}

		Response.Write(Output);
		dataReader.Close();
		command.dispose();
		conn.Close();
	  }
	}
}
When the above code is set, and the project is executed using Visual Studio, you will get the below output.
Output:-

We have seen how we can use ASP.Net commands such as SQLCommand and SQLReader to fetch data from a database. We also saw how we can read each row of the table display it on the web page.
There are methods available to link controls directly to different fields in the table. At the moment, only the below controls can be bound to an ASP.Net application
So let's see an example of how we can use control binding in ASP.Net. Here we will take a listbox example. Let's say we have the following data in our database.
TutorialID | TutorialName |
1 | C# |
2 | ASP.Net |
3 | VB.Net complete |
Let's use the Listbox control and see how it can automatically pick up the data from our Demotb table.
Let's follow the below-mentioned steps to achieve this.
Step 1) Construct the basic web form. From the toolbox in Visual Studio, drag and drop 2 components- labels and Listboxes. Then carry out the following substeps;
Below is how the form would look like once the above-mentioned steps are performed.

Step 2) The next step is to start connecting each listbox to the database table.

Step 3) You will then be presented with a dialog box. This can be used to create a new data source. The data source will represent a connection to the database. Choose the option of 'New data source'.

Step 4) The below screen will be prompted after choosing the new data source in the last step. Here we need to mention the type of data source we want to create.

Step 5) Now we need to create a connection to our database. In the next screen, click on the New Connection button

Step 6) Next you need to add the credentials to connect to the database.

Step 7) On the next screen, you will be able to see the Demotb table. Just click on the Next button to accept the default setting.

Step 8) You will now be able to test the connection on the next screen.

Step 9) Now on the final screen, you can click the 'OK' button. This will now bind the TutorialID listbox to the TutorialID field name in the 'demotb' table.

Step 10) Now it's time to bind the Tutorial Name listbox to the Tutorial Name field.

Step 11) You will already see the DemoDataSource when choosing the Data Source in the next screen.

If all the above steps are executed as shown, you will get the below-mentioned output.
Output:-

From the output, you can see that the listboxes display the Tutorial ID and Tutorial Names respectively
Summary
$20.20 $9.99 for today 4.6 (118 ratings) Key Highlights of ASP.NET Tutorial PDF 157+ pages eBook...
In this tutorial, you will learn- What is ASP.Net Life cycle? What is ASP.Net Page Life cycle?...
Download PDF 1) What is Web API? WebAPI is a framework which helps you to build/develop HTTP...
What is IIS? IIS or Internet Information Server is the server used to host .Net web applications. IIS is...
This is a curated list of most frequently asked .NET Interview Questions and Answers that help...
The HTTP protocol on which all web applications work is a stateless protocol. By stateless, it...