JSP
JSP Client Request, Server Response & HTTP Status Codes
JSP actions which use constructs in XML syntax to control the behavior of the servlet engine. We...
JSP Life Cycle is defined as translation of JSP Page into servlet as a JSP Page needs to be converted into servlet first in order to process the service requests. The Life Cycle starts with the creation of JSP and ends with the disintegration of that.
Let’s learn different phases of JSP Life Cycle
When the browser asks for a JSP, JSP engine first checks whether it needs to compile the page. If the JSP is last compiled or the recent modification is done in JSP, then the JSP engine compiles the page.
Compilation process of JSP page involves three steps:
JSP Lifecycle is depicted in the below diagram.

Following steps explain the JSP life cycle:
Let us have more detailed summary on the above points:
A Java servlet file is generated from a JSP source file. This is the first step of JSP life cycle. In translation phase, container validates the syntactic correctness of JSP page and tag files.
Demo.jsp
<html>
<head>
<title>Demo JSP</title>
</head>
<%
int demvar=0;%>
<body>
Count is:
<% Out.println(demovar++); %>
<body>
</html>
Code Explanation for Demo.jsp
Code Line 1: html start tag
Code Line 2: Head tag
Code Line 3 - 4: Title Tag i.e. Demo JSP and closing head tag
Code Line 5,6: Scriptlet tag wherein initializing the variable demo
Code Line 7 - 8: In body tag, a text to be printed in the output (Count is: )
Code Line 9: Scriplet tag where trying to print the variable demovar with incremented value
Code Line 10-11: Body and HTML tags closed
Demo JSP Page is converted into demo_jsp servlet in the below code.

Code explanation for Demo_jsp.java
Code Line 1: Servlet class demo_jsp is extending parent class HttpServlet
Code Line 2,3: Overriding the service method of jsp i.e. _jspservice which has HttpServletRequest and HttpServletResponse objects as its parameters
Code Line 4: Opening method
Code Line 5: Calling the method getWriter() of response object to get PrintWriterobject (prints formatted representation of objects to text output stream)
Code Line 6: Calling setContentType method of response object to set the content type
Code Line 7: Using write () method of PrintWriter object trying to parse html
Code Line 8: Initializing demovar variable to 0
Code Line 9: Calling write() method of PrintWriter object to parse the text
Code Line 10: Calling print() method of PrintWriter object to increment the variable demovar from 0+1=1.Hence, the output will be 1
Code Line 11: Using write() method of PrintWriter object trying to parse html
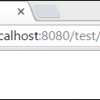
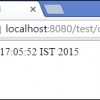
Output:

In the above example,
This is how a simple JSP page is translated into a servlet class.
public void jspInit()
{
	//initializing the code
}
void _jspservice(HttpServletRequest request HttpServletResponse response)
{
	//handling all request and responses
}
public void _jspdestroy()
{
            //all clean up code
}
JSP actions which use constructs in XML syntax to control the behavior of the servlet engine. We...
The database is used for storing various types of data which are huge and has storing capacity in...
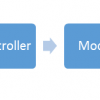
What is MVC? MVC is an architecture that separates business logic, presentation and data. In MVC, M...
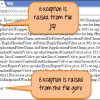
What is JSP Exception? Exceptions occur when there is an error in the code either by the developer...
In this tutorial, we will be learning the basic tags of JSP and how to add comments into JSP....
What are JSP Directives? JSP directives are the messages to JSP container. They provide global...